
Modifying a Jekyll Theme to fit your needs
There are several steps. In order, they are:
Step 1 - Create a github.io repository
Step 2 - Find a new theme you like
Step 3 - Replace your existing files with the theme’s files
Step 4 - Modify ad infinitum
Step 5 - Troubleshooting tips
Creating a Repository:
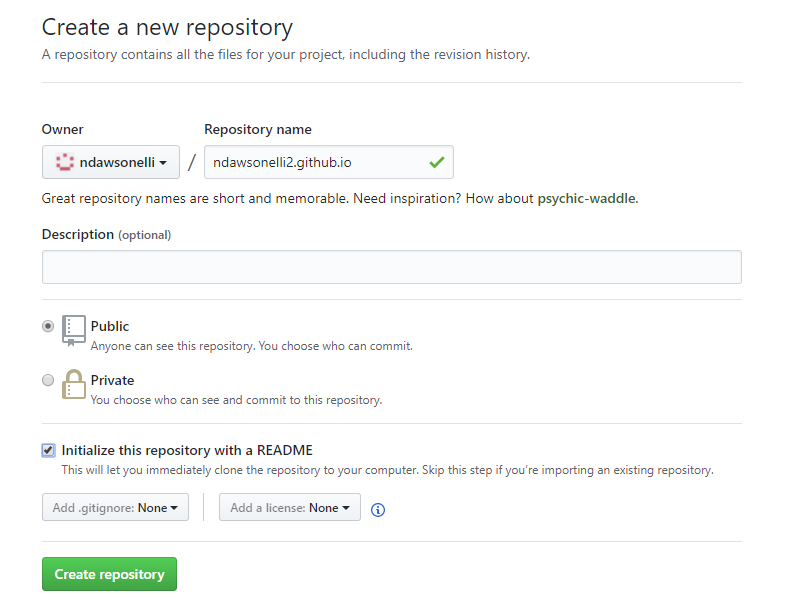
To create a repository, go to github and create a new repository. This can be done from the main page, once you’re logged in, and select the “New Repository” button.
Then, name your repository, as per the image below, and type whatever you’d like into the README:
Once your repository is created, make a new folder somewhere on your computer and clone the repository to it. This can be done using the following commands:
git init
git remote add origin httpw://github.com/<your_github_username>/<your_repository_name>.github.io.git
git pull -u origin master
Finding a Theme
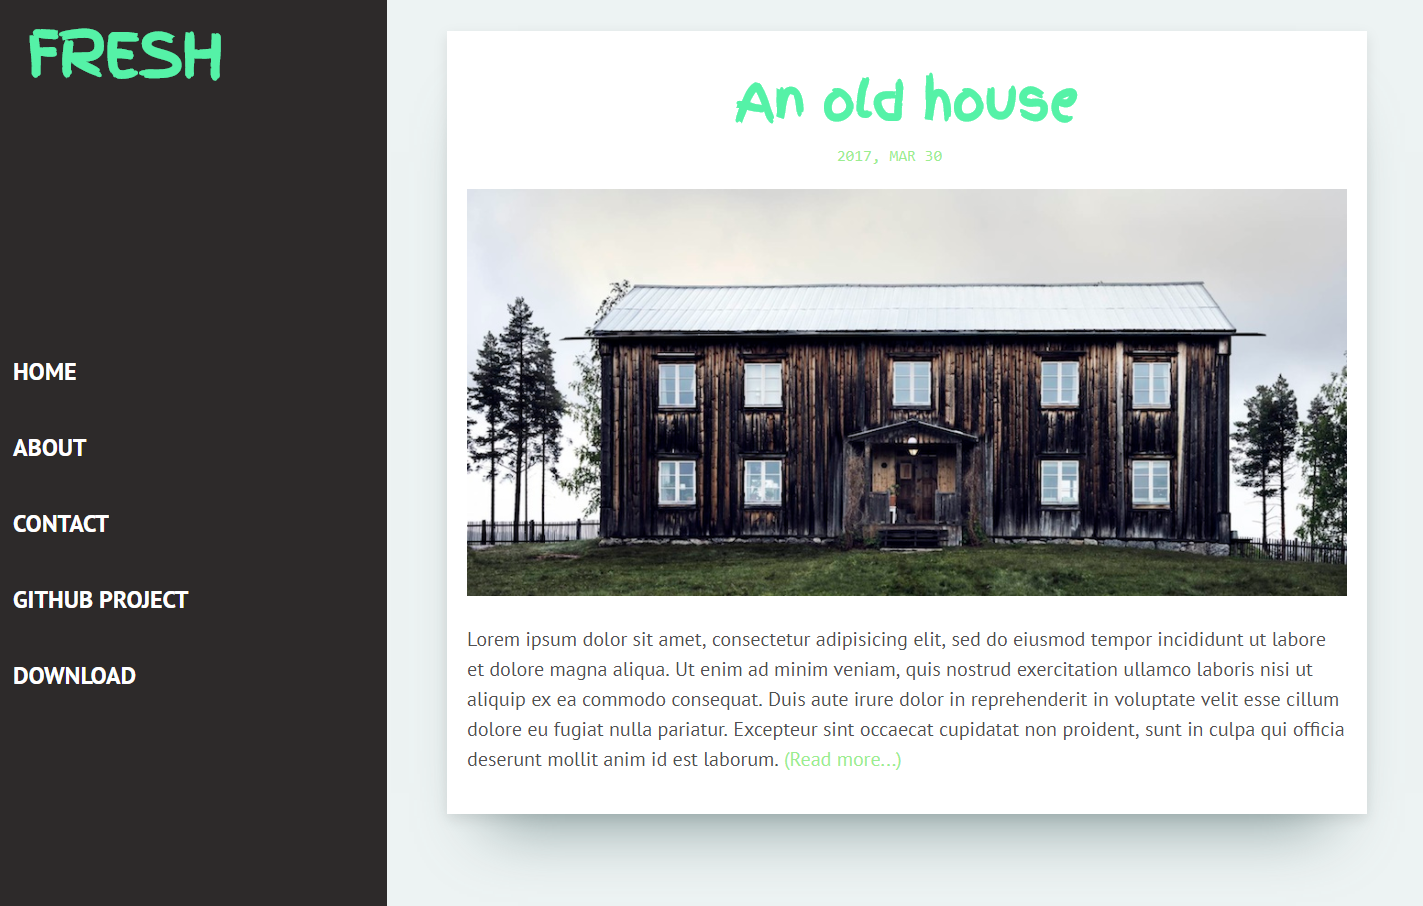
Head over to Jekyll-Themes and start scrolling through them. If you find one you like, check out the demo! This theme is called Fresh
Download the Theme
Select the Download button, unzip the file, and paste it into your newly created folder. Then, run the following commands. Feel free to change the commit message to whatever you like - the more descriptive, the better!
git add .
git commit -m "updating theme"
git push -u origin master
Next, head on over to your Github Pages home page! If you’re lucky, it’ll look like this:
If you’re not, it’ll look like this:
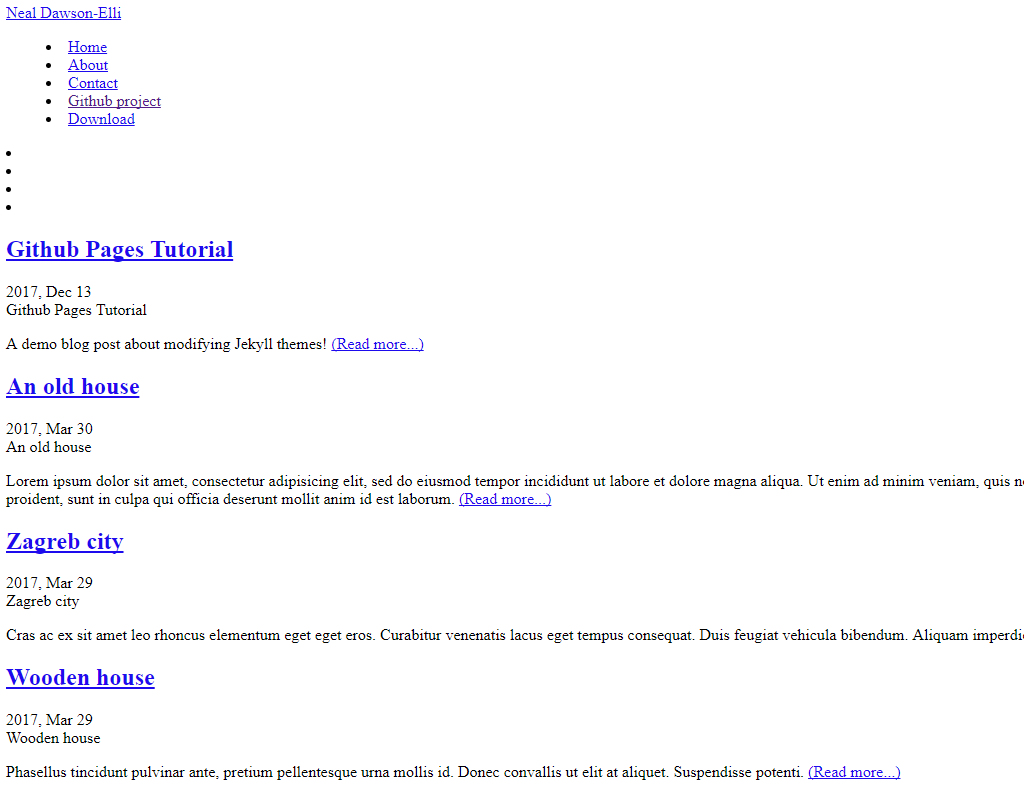
Now, we’re on to the final stage - modification and troubleshooting!
Troubleshooting and Modification
In order to fix the above error, we need to modify the file that controls a lot of the features of the website - config.yaml
Yaml is a language that is similar to Markdown that usually interpreted by an engine and used for high-level modifications.
In this instance, the problem is with baseurl - the default baseurl doesn’t match up with the other files which are created
by the jekyll engine. To fix it, all we have to do is set the baseurl to “”:
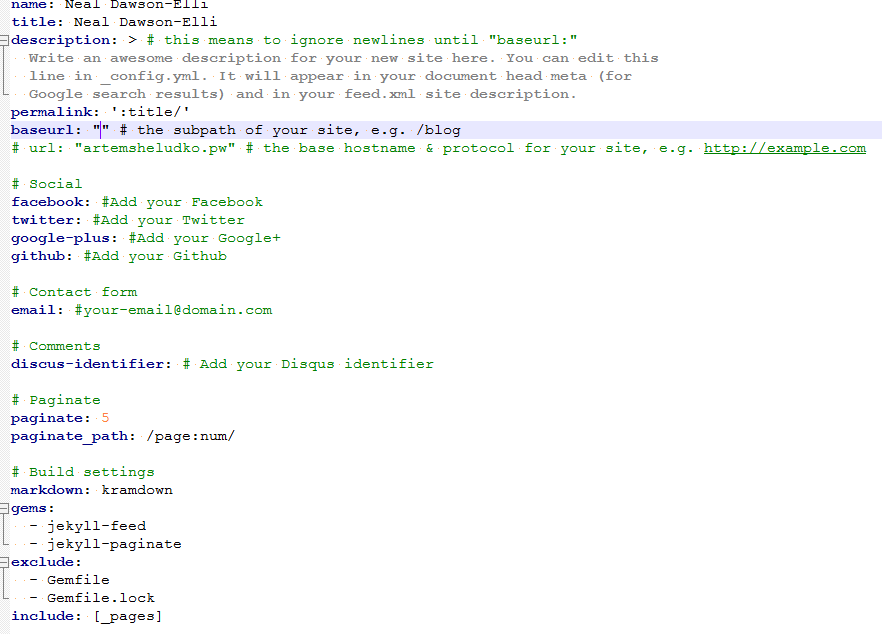
While we’re in there, we might as well modify the name and title as well. These may have different effects depending upon their implementation, but generally the title changes the text at the top of the web page, located in the tab.
In order for these changes to effect the webpage, we have to push them. in our Git Bash page, we type:
git add .
git commit -m "modified baseurl, changed name and layout"
git push
We wait, and the website rebuilds. This process is slightly slower than ideal, but it totally removes any installation on our end!
Next, we’d like to add a new blog post.
More Subtle Modifications - Understanding the File Structure
The following represents the overall file structure for jekyll:
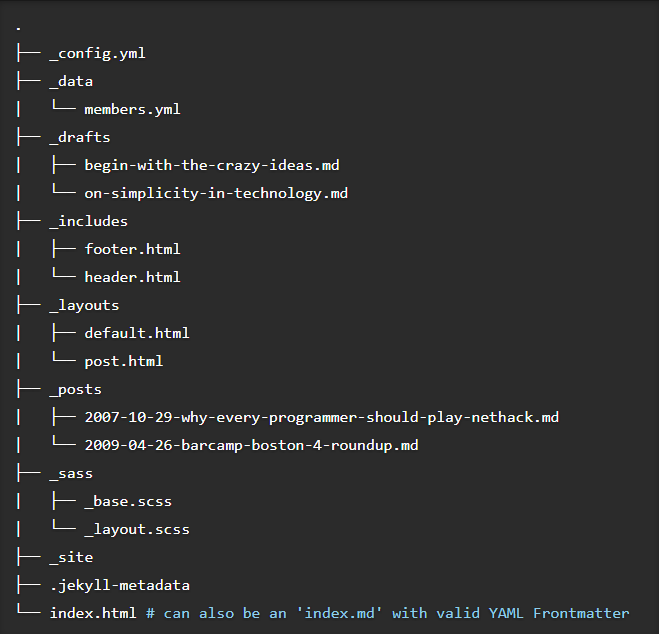
Most of these will vary depending upon the theme you choose, but I can give some hints here.
For example, Fresh doesn’t include an image on the home page. Since I want one, I have to figure out how to add it.
The thought process goes like this:
- Look at
index.html. Is it hard coded? - Look at the
_layouts. Is the modification there? - Look at the
_includes. Could it be in those files?
The index.html doesn’t seem to contain anything in particular:
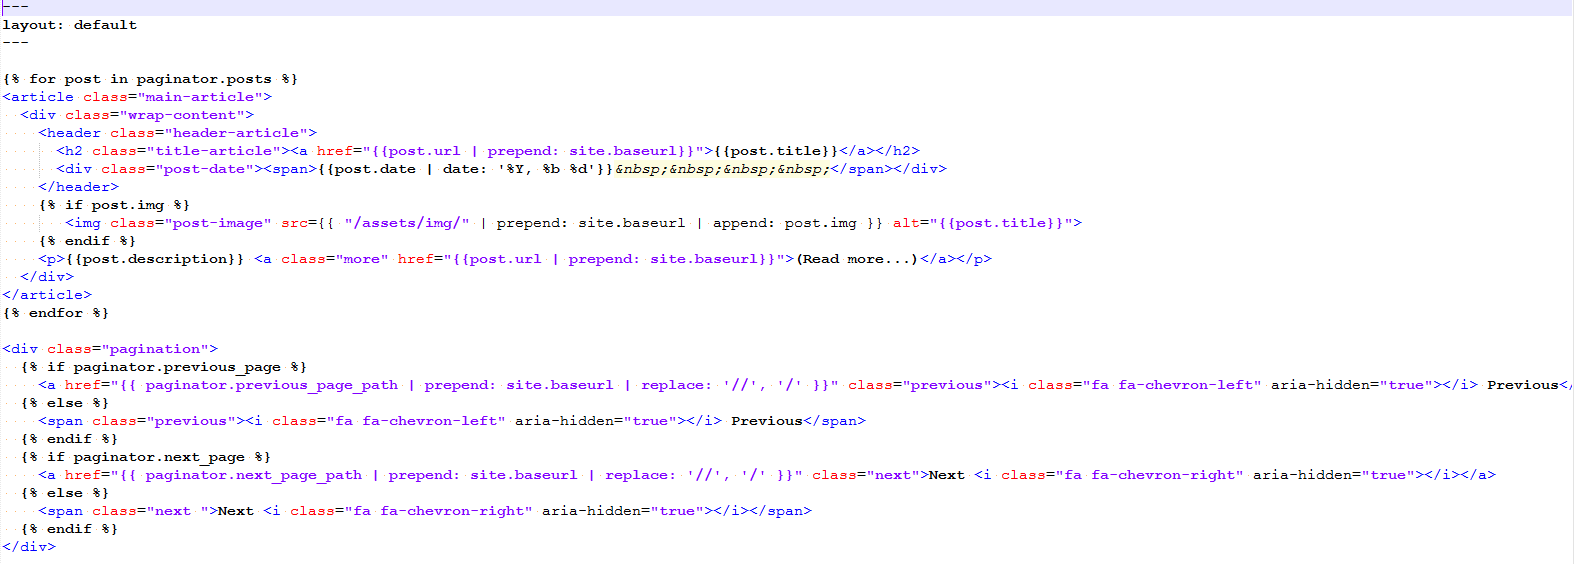
Anywhere that you see "{ blah blah }", that means there’s something responsive there. That’s how information is passed from Markdown files into html files.
From this image, it looks like most of the index.html is spent hosting the first artivle and then calling Paginator.
What about the _layouts?
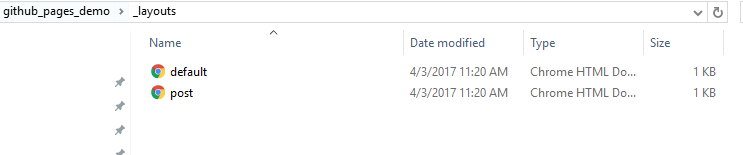
There are only 2 files - default and post. I know it’s not post, since that is the html file that makes the layout for each post. What about default?
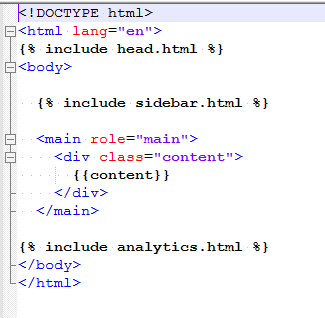
Bingo!
Inside default, I see some calls to include files. This means that the thing I want to change needs to be in the includes folder. If the files are named rationally, it’s most likely in the sidebar, since where I want to add it is a sidebar.
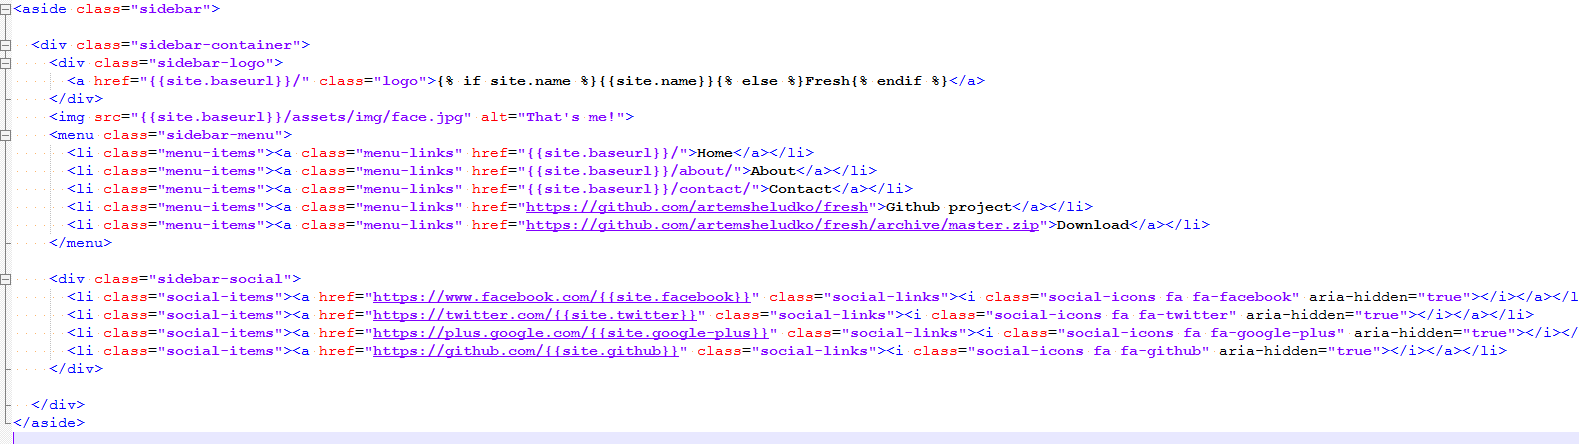
Here’s the sidebar.html from the _includes folder.
It looks like we’re in the right spot - I see Home, About, Contact, all the things that are near where I want to make changes.
But I don’t know how to put an image in html! I’m not a web developer!
Here is a link explaining it.
The line I added is there, right above the line that includes Home. Here’s the command:
<img src="/assets/img/face.jpg" alt="That's me!">
And now my image appears where I want it! Lucky me!
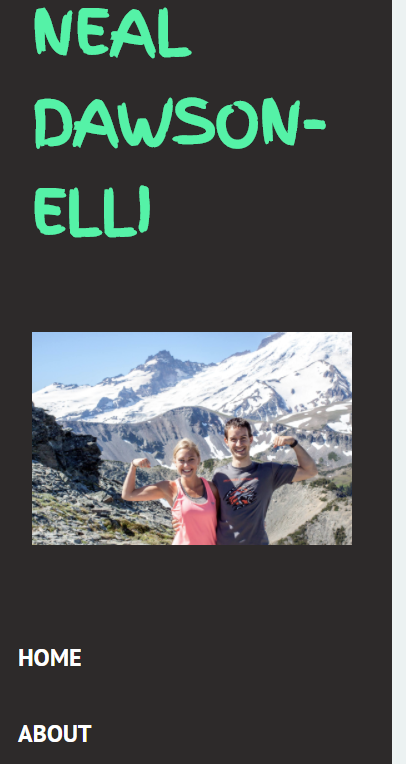
But what if that’s not good enough? I want a LinkedIn-style photo in a bubble! I hop on over to Flexible Jekyll because I see that he’s figured it out, and I poke around in his files. It turns out that he’s more sophisticated than me, and uses css to modify the image into that elegant little circle. However, with enough stapling and duct-taping, anything is possible!
And by adding the following to my .css and .scss files:
about {
  margin: 0 0 40px;
  text-align: center;
}

.about .cover-author-image {
  width: 100px;
  height: 100px;
  margin: 0 auto 10px;
  -webkit-border-radius: 100%;
          border-radius: 100%;
  overflow: hidden;
  background-color: #333030;
}

.about img {
  width: 100%;
  height: 100%;
  -webkit-border-radius: 50%;
          border-radius: 50%;
  -webkit-transition: -webkit-transform 0.35s;
  transition: -webkit-transform 0.35s;
  -o-transition: transform 0.35s;
  transition: transform 0.35s;
  transition: transform 0.35s, -webkit-transform 0.35s;
}
and by wrapping the image in the HTML in the expected named divs:
<div class="about">
	<div class="cover-author-image">
		<a href="/"><img src="/assets/img/face.jpg" alt="That's me!"></a>
	</div>
</div>
I have managed to turn my photo into a potato-quality circle!!

Next, I make it bigger by reading what the text did and expanding width to 300px everywhere that I pasted it, and hope for the best.
That doesn’t seem to work, so I change the webkit-border-radius to 90% and resize the image to be a square, as it seems to be
scaling it asymmetrically. And it works!

One again, proving that you don’t have to understand exactly how something works in order to implement it!
Additionally, I wanted to host a PDF of my resume on the About page.
It turns out that Markdown doesnt let you do that - but, html does, and it’s allowed in markdown! so:
<div>
<object data="https://ndawsonelli.github.io/assets/img/my_resume.pdf" type="application/pdf" >
    <embed src="https://ndawsonelli.github.io/assets/img/my_resume.pdf">
        This browser does not support PDFs. Please download the PDF to view it: <a href="https://ndawsonelli.github.io/assets/img/my_resume.pdf">Download PDF</a>.</p>
    </embed>
</object>
</div>
The above code snippet, along with a hard-coded reference to my pdf’s location, allow me to host the file in my web page. Updating the PDF file in /assets/img will also change the hosted file. Neat!
Knowing When Something Failed
Uh oh! I got a new email:

That means something went wrong in my previous build - it could be syntax, or it could be something else. In my case, it was not omitting the % in "{ blah blah }" -
Markdown recognizes it as a legitimate command and throws an error.